How To Replace Everydrop Water Filter: Easy 2026 Guide
Swapping out an EveryDrop water filter is a quick job that takes about five minutes and only requires twisting the old one out and locking a new one in. I still remember the first time I did it in my own kitchen, feeling that satisfying click when the new filter locked into place, and the water tasted fresh again by morning.
After helping dozens of friends and family members replace their filters over the years, I can tell you that the process is one of the easiest home maintenance tasks you will ever tackle. The whole thing is designed to be beginner-friendly, so even if you have never touched your refrigerator before, you can handle this with confidence.

Understanding EveryDrop Water Filters
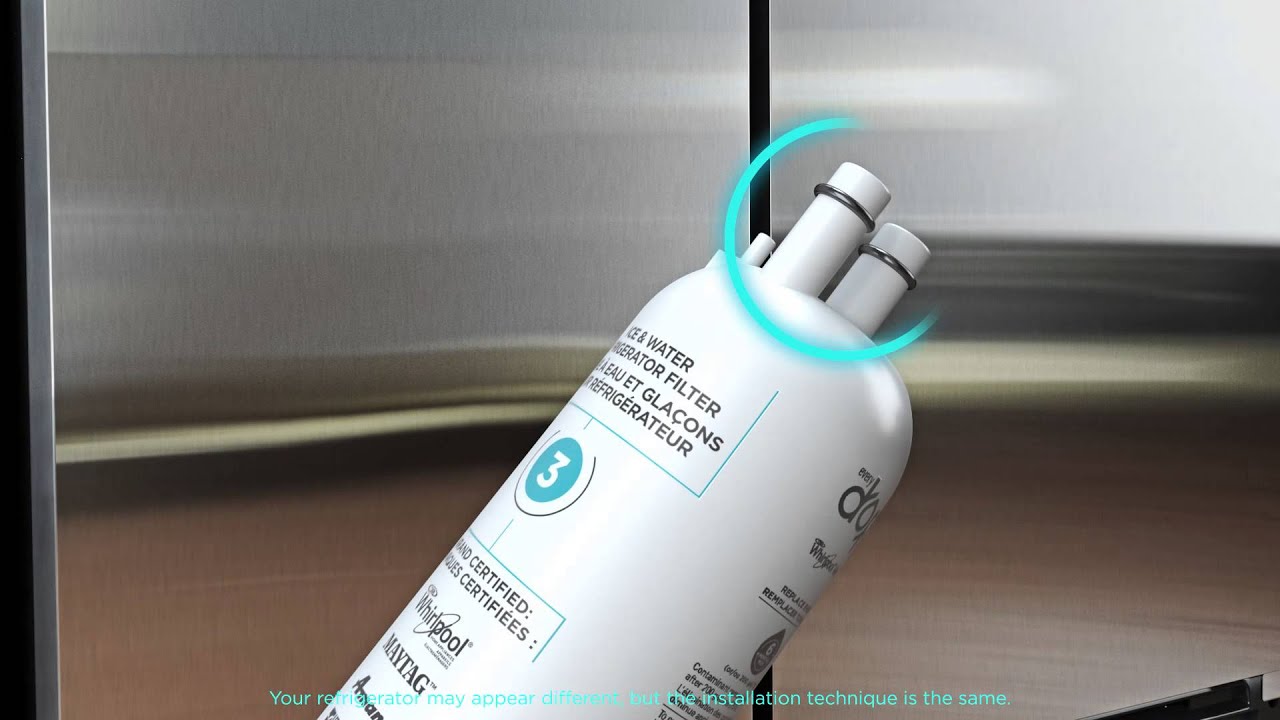
EveryDrop is a brand of refrigerator water filters made by Whirlpool Corporation, and it works with several major refrigerator models from brands like Maytag, KitchenAid, Amana, and JennAir. The filters use activated carbon to trap chlorine, lead, mercury, and other contaminants that affect the taste and safety of your drinking water and ice.
There are several filter models in the EveryDrop line, including the popular EveryDrop Filter 1, Filter 2, Filter 3, Filter 4, and Filter 5. Each one is designed for specific refrigerator brands and models, so picking the right replacement is half the battle. Most filters last about six months or 200 gallons, whichever comes first.
If you have noticed that your water has started tasting a little off, or your ice cubes look cloudy, those are usually the first signs that it is time for a swap. Some refrigerators even have a filter indicator light that will remind you when it is due.
Tools and Supplies You Will Need
The beauty of this task is that you barely need anything. Here is a short checklist before you start:
- New EveryDrop filter that matches your refrigerator model
- Clean towel or paper towel to catch drips
- A cup or container in case water spills out
- Optional: a small flashlight if your filter lives in a dark spot
That is really it. No wrenches, no pliers, no plumber required.
How to Replace EveryDrop Water Filter Step by Step
The exact location of your filter will depend on your refrigerator model, but it is usually either inside the refrigerator at the top right corner, in the base grille at the bottom front, or behind the kickplate. Let me walk you through the process.
Step 1: Locate the Filter
Open your fridge door and check the upper right corner first. Many models have the filter tucked inside a small housing that you twist or pull to open. If you do not see it there, crouch down and look at the bottom front grille. Some models hide the filter behind a small panel that snaps off easily with your fingers.
If you still cannot find it, your owner manual will show the exact location. Trust me, this little bit of detective work saves you from unnecessary frustration later.
Step 2: Remove the Old Filter
Most EveryDrop filters either twist out or pull straight out, depending on the model. For twist-style filters, turn the filter counterclockwise about a quarter turn until it releases. For pull-style filters, press the release button or tabs and slide the filter straight out.
Be ready for a small splash of water when it comes out. That is why your towel comes in handy. I have learned the hard way to always have a towel ready, or you will be wiping down your kitchen floor for the next ten minutes.
Step 3: Prepare the New Filter
Take your new filter out of its packaging and remove the protective cap from the nozzle. Some models also have a small plastic cover on the top that needs to come off. Make sure the rubber O-rings are in place and look undamaged, because a loose ring can cause leaks later.
It is a good idea to write the date on the new filter with a marker so you know when you installed it. I stick a small piece of tape on my fridge with the date, and it helps me stay ahead of the six-month replacement schedule.
Step 4: Insert the New Filter
Line up the new filter with the housing and slide it in. If it is a twist model, push it in and turn it clockwise until you hear that reassuring click. If it is a pull model, push it straight in until the locking tabs snap into place.
Do not force it. If it does not slide in smoothly, double-check that you have the correct filter model. Forcing the wrong filter can damage the housing and lead to expensive repairs.
Step 5: Flush the System
This step is critical and often skipped, but it makes a big difference. Run about two to four gallons of water through the dispenser to clear out any loose carbon particles and air bubbles. The first few cups might look gray or cloudy, which is totally normal.
I always run the water until it runs clear, then fill a glass and taste it. That first cold glass of clean water after a fresh filter install feels like a little reward for the effort.
Step 6: Reset the Filter Indicator
If your fridge has a filter light, you will need to reset it so it does not keep reminding you about the old filter. The reset method varies by brand, but usually it involves holding down a button for three to five seconds. Check your owner manual for the exact button on your model.
For many Whirlpool and KitchenAid refrigerators, you press and hold the filter button until the light changes color or goes off. On some models, you may need to press a combination of buttons, like the lock and filter buttons together.
Common Mistakes to Avoid When Replacing Your EveryDrop Filter
Over the years, I have seen people make the same handful of mistakes. Avoid these and you will be golden.
First, never skip the flushing step. Carbon dust is harmless but it makes the water taste funny and look cloudy. Flushing clears it out so your water tastes clean from the first sip.
Second, do not use a non-EveryDrop filter unless it is certified for your fridge. Third-party filters might save you a few dollars upfront, but they can fit poorly and leak, and they may not filter out all the contaminants your EveryDrop filter is rated to handle.
Third, do not forget to reset the indicator light. If you skip this, the light will stay on and you might forget when you actually changed the filter next time.
Fourth, keep an eye on the filter housing for cracks or wear. If the housing is damaged, even a brand-new filter will leak and cause problems.
How Often Should You Replace Your EveryDrop Filter?
The general rule is every six months or 200 gallons, whichever happens first. If you have a large family or use a lot of water and ice, you might need to change it sooner. If you live alone or use very little filtered water, you might stretch it to eight months, though I would not recommend waiting longer than that.
Hard water areas can also shorten filter life because the carbon works harder to trap extra minerals. If you notice a sudden drop in water flow, that is usually a sign the filter is clogged and needs replacing right away.
Benefits of Regularly Replacing Your EveryDrop Filter
Staying on top of filter changes does more than just improve taste. Fresh filters keep your fridge running efficiently because a clogged filter makes the water dispenser and ice maker work harder. They also protect your family from contaminants like lead, mercury, and chlorine byproducts, which is the whole reason you bought the filter in the first place.
There is also the peace of mind that comes with knowing your water is clean. After you replace the filter and run a few glasses, you can actually taste the difference. The water tastes crisp, fresh, and free of that faint plastic or chemical aftertaste that old filters leave behind.
What to Do With the Old Filter
Once you have removed the old EveryDrop filter, do not toss it in the regular trash. Most local recycling centers accept used water filters because the plastic housing and activated carbon inside can both be recycled.
Some manufacturers, including EveryDrop, also run recycling programs where you can mail back your old filter for proper disposal. It is a small step that keeps plastic out of landfills, and it only takes a minute to drop the old filter in the recycling bin.
Troubleshooting Tips After Installation
If you notice leaks after installing your new filter, the most common cause is a loose fit or a misplaced O-ring. Turn off the water dispenser, remove the filter, and check that everything is seated properly.
If the water flow is weak after replacement, give it a few minutes and try again. Sometimes the filter needs a moment to fully saturate before water flows normally. Flushing for several minutes usually solves this.
If the filter indicator does not reset, try unplugging the refrigerator for about a minute, then plug it back in and try the reset process again. This works on most modern refrigerators and clears up minor electronic glitches.
Choosing the Right EveryDrop Replacement Filter
EveryDrop filters are not one-size-fits-all. Filter 1 fits many Whirlpool models, Filter 2 fits several Maytag and Amana refrigerators, and so on. The easiest way to find the right one is to look at your current filter and match the model number, or check your refrigerator manual under the specifications section.
If you cannot find the model number, you can search the EveryDrop website using your fridge model number, and it will tell you which filter you need. Buying the wrong filter is one of the most common frustrations, so this little bit of research up front saves you time and hassle.
Why I Recommend Sticking With Genuine EveryDrop Filters
I know it is tempting to buy the cheaper third-party options online, especially when you see filters at half the price. After testing several of them over the years, I have found that the quality varies wildly. Some work fine, but others leak, reduce water flow, or leave a strange taste.
EveryDrop filters are tested and certified to NSF standards for reducing specific contaminants. That certification matters because it means a third-party lab has verified the filter actually does what it claims. When I am putting something in my family’s water, I want that peace of mind.
Frequently Asked Questions About Replacing EveryDrop Water Filters
Do I need to turn off the water before replacing my EveryDrop filter?
No, you do not need to shut off the water supply. The filter is designed to be replaced while the fridge is still running. Just have a towel ready for any drips.
Why is my water cloudy after installing a new EveryDrop filter?
Cloudy water is normal for the first few gallons. It is just tiny air bubbles and harmless carbon dust being flushed out. Run two to four gallons through the dispenser and it will clear up.
Can I use a generic water filter instead of EveryDrop?
You can, but it is not recommended. Generic filters may not fit properly, may not filter the same contaminants, and can void your refrigerator warranty in some cases.
How do I know which EveryDrop filter I need?
Check the label on your current filter, look in your fridge manual, or search using your refrigerator model number on the EveryDrop website.
What happens if I forget to replace my EveryDrop filter?
Your water may start tasting off, ice may look cloudy, and the dispenser flow may slow down. More importantly, the filter will no longer be effectively removing contaminants, which defeats the purpose of having it.
Conclusion
Replacing your EveryDrop water filter is one of the simplest things you can do to keep your water tasting great and your family healthy. The whole process takes about five minutes, costs less than most takeout lunches, and gives you peace of mind every time you fill a glass.
If you have been putting off the change, grab a new filter today and knock it out. Your future self will thank you every time you pour a cold, crisp glass of water. And if you found this guide helpful, drop a comment below with your own tips or share it with someone who needs to swap their filter this week.