How to Clean a Fridge Water Filter (2026) — Honest Reviews
Figuring out how to clean a fridge water filter often starts with a misunderstanding: most people don't realize that the vast majority of these filters are not meant to be cleaned at all. They're made to be replaced, not scrubbed. Trying to salvage a disposable cartridge can actually do more harm than good, potentially damaging the filter or letting unwanted contaminants through into your drinking water.
Our research indicates that as of 2026, the typical refrigerator water filter is a sealed, disposable unit designed for a specific lifespan, often around six months or after filtering about 300-500 gallons of water, depending on the model and water quality. The real question isn't how to clean it, but if it's even possible.
Is Your Fridge Water Filter Cleanable? Identifying the Type is Key
The fundamental distinction when it comes to cleaning your fridge's water filter lies in its design: disposable or reusable. This single factor dictates whether cleaning is an option or a definite no-go.
Disposable vs. Reusable: What's the Difference?
The distinction between disposable and reusable filters is where the "cleaning" question hinges. One type is designed for replacement, the other for maintenance.
Disposable Cartridges: Designed for Replacement
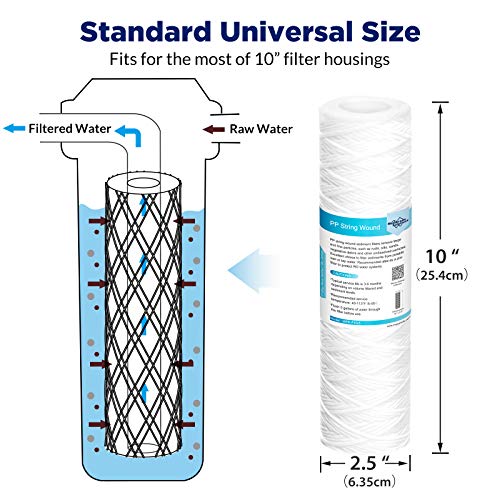
These are the workhorses in most modern refrigerators. A disposable fridge water filter cartridge is a sealed unit, typically housed in plastic, designed to be swapped out for a fresh one at regular intervals. They contain specialized media to filter out common impurities like chlorine, sediment, and other taste- or odor-causing compounds.
Manufacturer specifications consistently advise against attempting to clean or regenerate these cartridges. They are engineered for single use and replacement.
Reusable Filters: Built for Cleaning
On the flip side, reusable filters are a much rarer find in today's refrigerators. These systems usually involve a filter element, often a mesh screen or a more robust porous material, housed within a component that can be opened. The intention here is that the user can remove the filter material, clean it under running water, and then reinsert it.
Why You Shouldn't Clean Disposable Filters
Trying to clean a disposable fridge water filter is a pretty common impulse, but it's one that usually leads to disappointment and potential problems. These filters are engineered with internal structures and filtration media that can be easily disrupted or damaged by washing.
Aggregated user reviews often report that attempting to clean a disposable filter results in:
- Reduced filtration effectiveness: Washing can dislodge or degrade the materials responsible for trapping contaminants.
- Compromised water quality: The filter could leak fine particles or react with cleaning agents, making your water taste worse or even be unsafe.
- Physical damage: The delicate internal structure can be crushed or torn, rendering the filter useless.
The lifespan for a typical disposable filter is often cited by manufacturers as being between 6 months, or after it has filtered approximately 300 gallons of water. Exceeding this, or trying to extend its life through cleaning, is generally not recommended.
How to Clean a Reusable Fridge Water Filter (If You Have One)
If you've confirmed you have a reusable filter system (a rare but exciting find!), then cleaning it is a straightforward maintenance task. The process is designed to remove accumulated sediment and ensure continued clear water flow.
Step 1: Turn Off the Water Supply
Before you start, locate the main water shut-off valve for your refrigerator. This is critical. Turn it off completely to prevent any leaks or accidental spraying when you disconnect the filter.
Step 2: Locate and Remove the Filter
Consult your refrigerator's user manual to find the exact location and method for removing the filter. It usually involves accessing a compartment and either twisting the filter out, pressing a release button, or pulling a lever. Have a towel ready for any residual water.
Step 3: Disassemble (If Applicable)
Some reusable filters come apart into multiple pieces, like a housing and the filter element itself. If yours separates, carefully take it apart, noting how each piece fits together.
Step 4: Rinse Under Cool Water
Take the disassembled filter components to your kitchen sink. Use cool, running tap water to rinse away any loose debris, sediment, or visible particles. This is the primary step for removing surface gunk.
Step 5: Gentle Scrubbing (Use Caution)
If there's any stubborn residue that doesn't rinse away easily, you can try gentle scrubbing. Use a very soft brush, like a new, dedicated toothbrush, or even just your fingers to carefully loosen the grime. Critically, avoid any soaps, detergents, or chemical cleaners. These substances can be absorbed by the filter material and then transfer to your drinking water, defeating the purpose of filtration.
Step 6: Soaking (Manufacturer Recommended Only)
Some reusable filter manufacturers might suggest a specific soaking solution, often plain water or a diluted hydrogen peroxide solution, for a predetermined time. This step depends entirely on the filter's material composition. Always refer to the specific guidance from your refrigerator or filter manufacturer before attempting any soaking. They'll provide exact proportions and soak times if it's recommended.
Step 7: Rinse Again
After any scrubbing or soaking, give the filter parts another thorough rinse under cool, clean tap water. This ensures that any loosened particles or soaking solution residue is completely washed away. You want the filter to be as pristine as possible before it goes back into service.
Step 8: Dry Thoroughly
Allow the filter components to air dry completely. You can place them on a clean towel or drying rack in a well-ventilated area. Some might suggest patting them dry with a clean, lint-free cloth, but air drying is generally preferred to minimize introducing any fibers or contaminants.
Step 9: Reassemble and Reinsert
Once everything is bone dry, reassemble any parts you took apart. Then, carefully reinsert the clean, dry reusable filter into its designated housing in the refrigerator. Ensure it's seated correctly and clicks or locks into place securely, just as it was before removal.
Step 10: Turn Water Back On and Check for Leaks
Slowly turn the main water supply valve back on. Watch closely around the filter housing and connections for any signs of dripping or leaks. If you spot any, turn the water off again and ensure the filter is properly seated or that any seals are intact.
Step 11: Flush the System
After reinserting the filter and confirming no leaks, it's essential to flush the system. Run about 2 to 4 gallons of water through your refrigerator's dispenser. This process purges any air that entered the lines and flushes out any remaining loose particles or potential cleaning agents. Your water may appear cloudy initially; this is normal and will clear up as you continue flushing.
Mistakes to Avoid When Cleaning Fridge Water Filters
Trying to clean your fridge's water filter without understanding its type is the biggest mistake, but even with reusable filters, there are pitfalls. Aggregated user feedback and manufacturer guidelines point to several common errors that can reduce the filter's effectiveness or even damage it.
Here are some key mistakes to steer clear of:
- Cleaning Disposable Filters: As we've stressed, this is the number one error. Disposable cartridges are designed with internal media that can be destroyed by washing, leading to poor filtration.
- Using Soaps or Chemicals: Never use dish soap, detergents, bleach, vinegar, or any kind of chemical cleaner on your filter. These can be absorbed by the filter material and then transfer to your drinking water, potentially making it unsafe or unpleasant.
- Using Abrasive Materials: Scrubbing with steel wool, harsh sponges, or stiff brushes can scratch or damage the filter's surface or internal structure, compromising its ability to filter properly.
- Not Turning Off the Water: Attempting any filter removal or maintenance without shutting off the water supply is a recipe for a messy flood. Always find and turn off the main shut-off valve first.
- Improper Reinstallation: Forcing the filter or not seating it correctly can lead to leaks and prevent the system from sealing properly, allowing unfiltered water to pass through.
- Omitting the Flush: Failing to run 2-4 gallons of water through the dispenser after cleaning or replacing a filter means you're drinking residual debris or air bubbles from the system.
When to Replace Your Fridge Water Filter
Knowing when to replace a disposable fridge water filter is crucial for maintaining water quality. These filters have a finite lifespan and gradually become less effective over time. The most common indicators are your refrigerator's built-in filter indicator light and changes in your water or ice quality.
Here's a breakdown of when it's time for a new filter:
- Filter Indicator Light: Most modern refrigerators have a 'Replace Filter' or 'Change Filter' light that illuminates. This is usually tied to a timer or water usage counter. Pay attention to this indicator; it's the most direct prompt from your appliance.
- Reduced Water Flow: If you notice a significant slowdown in how fast water dispenses from your fridge, the filter is likely clogged with sediment and needs replacement.
- Tastes or Odors: A change in the taste or smell of your water or ice is a strong signal that the filter is no longer effectively removing impurities. This is especially true for chlorine tastes.
- Cloudy Ice: If your ice cubes are consistently cloudy or have white specks, it can indicate that the filter is no longer capturing dissolved minerals or sediment.
- Time Since Last Replacement: Even if no indicator light appears, manufacturers and industry standards typically recommend replacing disposable filters every six months. This timeframe ensures optimal performance and safety. For instance, NSF International standards, such as NSF/ANSI 42 for aesthetic effects and NSF/ANSI 53 for health effects, guide filter performance and replacement schedules.