How to Install Ro Water Filter System 2026: Hands-On Review
Installing a reverse osmosis (RO) water filter system at home might seem like a big plumbing project, but it’s more about understanding a few key connections. If you're wondering how to install an RO water filter system yourself, you're in the right place. We'll break down what you need to know, focusing on clear steps and visual cues to make the process smooth.
Our research shows that most under-sink RO systems follow a similar installation pattern, involving connections to your cold water line and drain. Manufacturer specifications often indicate a typical installation time of 1-3 hours for someone with basic DIY plumbing familiarity. This guide covers everything from unpacking your system to running the first batch of purified water.
Installing Your Under-Sink RO Water Filter System: A Visual Guide
This section is where we really dive into what you're dealing with. Installing an RO system isn't as intimidating as it looks, especially when you know what to expect visually. It’s all about understanding the flow of water and where each piece fits. Think of it like connecting a few new hoses under your sink.

The main goal is to integrate the RO system into your existing plumbing without causing leaks or disruptions. We'll guide you through the crucial connections, showing you what looks right and what to watch out for. Following these visual cues is key to a successful, leak-free installation.
Why Visuals Are Your Best Friend Here
When you're working with plumbing under the sink, seeing is believing. Generic text instructions can only go so far. Diagrams and clear photos show you the exact angle to connect a tube, how a fitting should seat, or where a component typically sits. The shape of a connector, the color-coding of tubes, and the overall layout under your sink are all visual clues that make the difference between an easy install and a plumbing headache.
Manufacturer instructions often include detailed diagrams for a reason, they're essential for understanding the spatial relationships between different parts. We'll reference these visual elements throughout this guide, pointing out what to look for in your own setup.
What's In Your RO System Box?
Before you can start connecting anything, you need to know what parts you're working with. Most under-sink RO systems come as a kit, and it’s smart to lay everything out and check it against the included parts list. This ensures you have all the necessary components and hardware for installation.
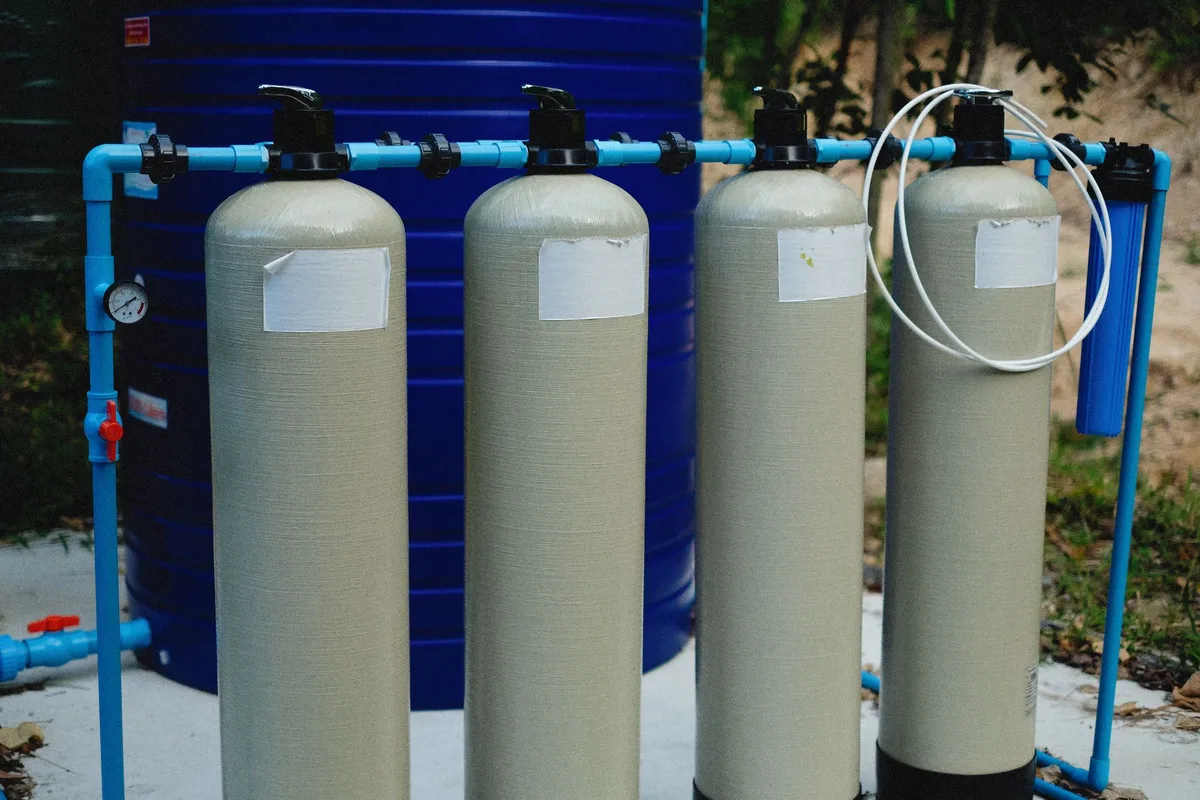
Core Components Breakdown
You'll typically find several key components in your RO system package:
- RO Membrane: This is the heart of the system, a semi-permeable membrane that filters out impurities at a molecular level.
- Filter Housings: These cylindrical casings hold the pre-filters and post-filters.
- Sediment Filter: Usually the first stage, it removes larger particles like sand and sediment.
- Carbon Filters (GAC/Carbon Block): These stages remove chlorine, odors, and volatile organic compounds (VOCs).
- Post-Carbon Filter: Often the final stage, it polishes the water for improved taste.
- Storage Tank: RO systems produce water slowly, so a pressurized tank stores purified water for immediate use.
- RO Faucet: A dedicated faucet, usually mounted on your sink or countertop, to dispense the purified water.
- Tubing and Fittings: Various lengths of plastic tubing and quick-connect or threaded fittings to connect all the components.
- Drain Saddle Clamp: This fitting attaches to your sink's drain pipe to allow wastewater from the RO process to be removed.
- Feed Water Adapter/Tee Valve: Connects the RO system to your main cold water supply line.
- Shut-off Valve: Usually integrated into the feed water adapter, it allows you to isolate the RO system.
Features to Look For
When assessing your kit, consider these features:
- Micron Rating: Filters are rated by how small a particle they can capture (e.g., 5 microns). Higher numbers mean larger pores.
- Filter Lifespan: Manufacturers state how many gallons of water a filter can process or how many months it’s expected to last.
- Flow Rate: Measured in gallons per minute (GPM), this indicates how quickly you can dispense water.
- Water Waste Ratio: RO systems produce wastewater. A common ratio is 1:1 or 4:1 (wastewater to purified water), though newer systems are more efficient.
- Material Quality: Look for BPA-free plastics and sturdy construction. NSF certifications ensure components meet safety standards.
Setting Up for Success: Pre-Installation Checks
Before you can start connecting anything, a few crucial checks will save you a lot of hassle. This stage is all about preparation and ensuring you have a clear plan, the right tools, and a good understanding of your under-sink workspace.
Tools You'll Actually Need
Gathering your tools upfront makes the installation process much smoother.
- Adjustable Wrench or Pliers: For tightening fittings.
- Phillips Head Screwdriver: For mounting components.
- Drill and Drill Bits: If you need to drill a hole for the RO faucet or drain saddle.
- Bucket: To catch residual water when disconnecting lines.
- Teflon Tape (Plumber's Tape): For threaded connections as specified by the manufacturer.
- Measuring Tape: To ensure tubing lengths are adequate.
- Pen or Marker: For marking drill points or tube cuts.
- Safety Glasses: Always protect your eyes.
- Towels or Rags: For inevitable drips and spills.
Understanding Your Under-Sink Space
Your kitchen sink cabinet is usually where the RO system lives, but space can be tight. Take a good look at what's already under there:
- Existing Plumbing: Identify your cold water supply line. This is usually a pipe feeding your faucet.
- Drain Pipe: Locate the vertical or horizontal drain pipe your sink empties into. The drain saddle will attach here.
- Available Space: See where the RO filter housings and storage tank can fit without obstructing cleaning supplies or pipes. Most systems need vertical space for the filter housings.
- Power Outlet (if applicable): Some RO systems have electric pumps or UV sterilizers that require power.
Check if your chosen location provides easy access for future filter changes. If you need to install a new faucet hole in a stainless steel or composite sink, have a suitable drill bit ready. Some manufacturers offer sink hole drilling templates to help with precision.
Step-by-Step: Connecting the Plumbing (The Visual Part!)
This is the core of installing your RO system. We’ll walk through the connections conceptually, highlighting what each step looks like and why it’s important. Detailed diagrams from your specific RO system’s manual are your best friends here, but these steps cover the universal process.
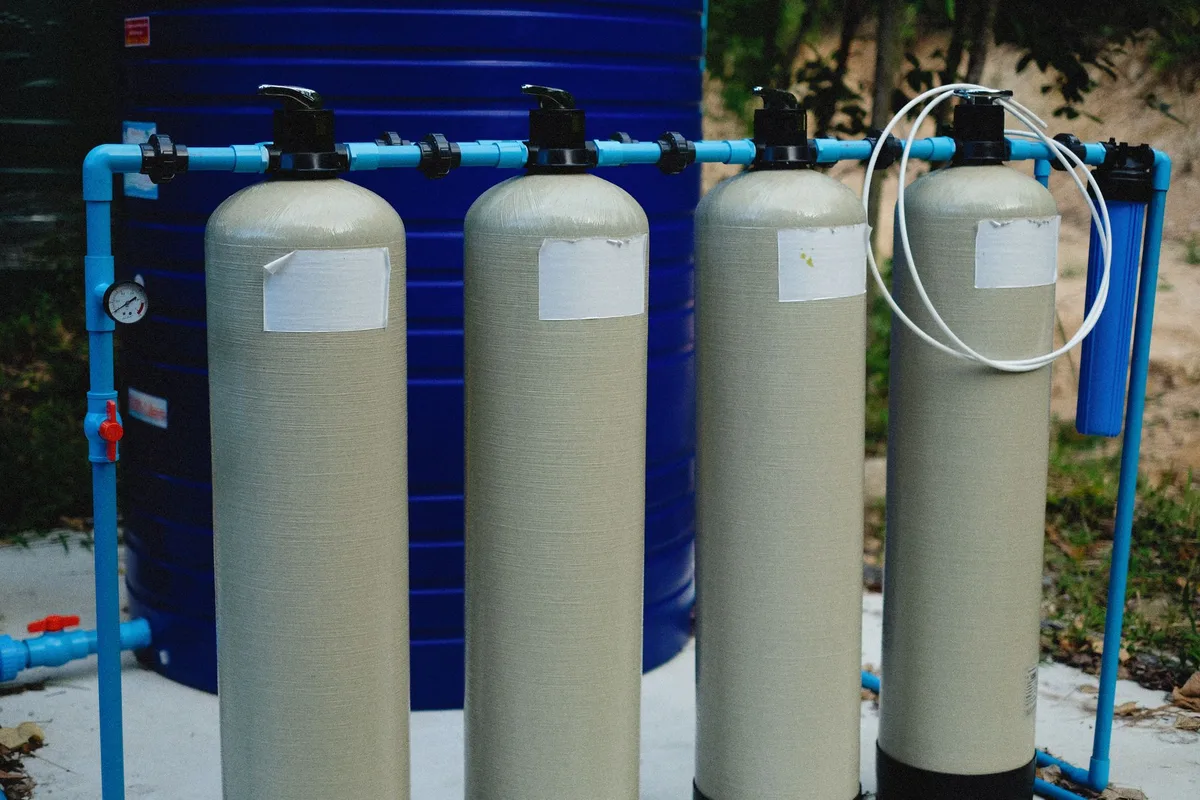
Turning Off Water & Draining Lines
First crucial step: locate the cold water shut-off valve under your sink. This is typically a small handle or knob on the pipe leading to your faucet. Turn it clockwise until it stops. Then, turn on your regular kitchen faucet to relieve any remaining pressure and drain water from the line.
Place a bucket under the existing connections to catch residual water.
Installing the Feed Water Adapter
This adapter splits your cold water supply, sending one line to your faucet and another to the RO system. It usually screws onto the existing cold water pipe where your faucet line was connected. Once attached, you'll connect the designated RO tubing to this adapter. Ensure it's snug but don't overtighten, which can strip threads or damage the connection.
Manufacturer specifications often recommend specific torque settings if precise measurements are needed.
Routing the RO Tubing Neatly
You'll have several lengths of tubing. Use the provided tubing to connect the feed water adapter to the first filter housing, then connect subsequent housings in the correct order. Plan the route to avoid kinks, sharp bends, or areas where the tubing could be pinched. Quick-connect fittings are common; ensure the tubing is pushed in all the way and the locking collar is engaged.
Connecting the Filters and Membrane Housing
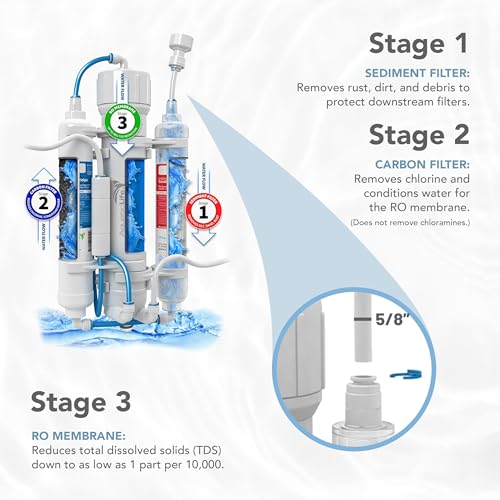
Your RO membrane is usually the last filter in the sequence before the water enters the storage tank. Connect the filter housings in the order specified by your manual (typically sediment, then carbon stages, then the membrane housing). Ensure that water flows from the input of one housing to the output of the next, following the directional arrows if present.
Attaching the RO Faucet to Your Sink
This step requires either using an existing hole in your sink or countertop, or drilling a new one. If drilling, use a suitable bit for your sink material. Feed the faucet's mounting shank and water line through the hole, and secure it from underneath using the provided hardware.
Connecting the Drain Line Securely
The drain saddle clamp attaches to your sink's drain pipe, typically above the P-trap. This is where the wastewater from the RO process is directed. Follow your manual's instructions carefully for assembly, ensuring a tight seal to prevent leaks and odors. The RO system's flow restrictor is usually installed on this drain line to maintain proper pressure within the system.
Hooking Up the RO Storage Tank
The storage tank connects to the output of the membrane housing. Purified water will fill this tank. Make sure the tank is placed in a stable position under the sink. Your RO system's installation manual will detail how to connect the tubing from the membrane outlet to the tank's inlet valve, and then from the tank's outlet to the RO faucet.
First Flush and System Check: What to Watch For
After all the connections are made, you're almost done. The next step is critical for ensuring your RO system is working correctly, and it involves flushing the system to remove any manufacturing residue and air. This process also checks your work for leaks. It’s where you see your investment start to deliver on its promise of cleaner water.
The All-Important Flushing Process
Most manuals recommend running a full tank of water through the system and discarding it. This helps rinse out any fine particles or plasticizers from new filters and the RO membrane. Some systems require you to do this multiple times. Leave the tank valve open during this first flush so the water can pass through directly to the drain.
After the initial flush, close the tank valve and let the tank fill completely. Once full, shut off the valve on the feed water adapter. You'll then open the RO faucet and let it run until the tank is empty. Repeat this fill-and-drain cycle at least once more, or as recommended by your manufacturer.
Your system's specification sheet will likely detail the required GPM for effective flushing.
Spotting Leaks: A Visual Inspection
While the system is filling and flushing, keep a close eye on all the connection points. Dry the area around each fitting with a towel and look for any drips or moisture. Even a small seep can become a larger leak over time. Quick-connect fittings should be visually inspected to ensure the tubing is fully seated and the locking ring is in place.
If you find a leak at a quick-connect, try pushing the tubing in a bit further and reseating the locking ring.
Common Installation Pitfalls: What to Watch Out For
Even with clear instructions, a few common mistakes can trip up DIY installers. Knowing these ahead of time can help you avoid them. These aren't necessarily system failures, but they can affect performance, lifespan, or cause minor annoyances.
Tubing Kinks and Crushes
One of the most frequent issues is how the tubing is routed. If tubing is bent too sharply, it can kink. A kink restricts water flow, reducing the efficiency of the RO process and potentially straining the components. Similarly, if the tubing is routed where it can be pinched, like between the cabinet floor and a drawer, it can lead to a blockage or even crack the tubing over time.
Always ensure tubes have gentle curves and are not under pressure from other objects.
Overtightening vs. Undertightening Fittings
It might seem like tighter is always better for plumbing, but that's not true with RO systems. Overtightening threaded fittings can strip the threads on the plastic components, leading to leaks that are difficult to fix. For quick-connect fittings, overtightening the collar or forcing the tubing can damage the fitting or the tube itself. Conversely, undertightening a threaded connection or not fully seating a quick-connect will almost certainly result in a leak.
The key is "snug" for threaded connections, and a firm push for quick-connects, followed by a visual check.
Incorrect Filter Order Mistakes
RO systems use multiple stages, and the order of these filters is crucial for optimal performance and longevity. Typically, the sediment filter comes first to protect subsequent, finer filters. Carbon filters follow to remove chlorine and chemicals that could damage the RO membrane. The membrane itself is usually one of the last stages, with a post-filter polishing the water for taste.
Installing them out of order can lead to premature filter clogging or membrane damage, significantly shortening their lifespan. Always consult your manual for the correct filter staging.
Drain Line Smells or Backup Issues
If you notice unusual odors coming from your sink or a slow drain, it might be related to the RO drain line. A common cause is improper installation of the drain saddle or a blockage in the drain line itself. Ensure the saddle is securely attached and that the tubing connected to it isn't pinched or obstructing the drain flow. The wastewater from an RO system is normal, but it shouldn't back up into the system or cause your sink to drain slowly.
Maintenance: Keeping Your RO System in Top Shape
Regular maintenance isn't just about replacing filters; it's about ensuring your RO system continues to deliver pure, great-tasting water for years. Think of it like servicing your car, a little attention now prevents bigger problems later. Most tasks are straightforward and can be done without specialized tools.
Filter Replacement Made Simple
Your RO system typically has a set of pre-filters (sediment and carbon) that need changing more frequently than the main RO membrane. Manufacturer specifications usually suggest replacement every 6 to 12 months, depending on your water quality and how much water you use. Replacing these is crucial because clogged filters reduce water flow and can force the system to work harder, potentially shortening the life of the RO membrane.
When it's time to change filters, you'll typically unscrew the filter housings, remove the old cartridges, and insert the new ones. Always ensure you're using the correct filter types and sizes specified by your RO system's manufacturer. Many systems use standard filter sizes, but it's best to double-check your manual. Note the order of filters to ensure you put them back in the correct sequence.
When to Swap Out the RO Membrane
The RO membrane is the core of the purification process, and it's designed to last much longer than the pre-filters. Replacement intervals for the membrane typically range from 2 to 5 years. However, this can vary significantly based on the quality of your incoming water, high TDS or hard water will reduce its lifespan.
You'll know it might be time to replace the membrane if you notice a significant decrease in the amount of purified water produced, or if the taste of your water starts to decline even after changing the other filters. Some advanced systems may include a TDS meter or an indicator light that alerts you when the membrane's performance is significantly degraded.
Costs and Considerations: What to Expect
The initial purchase price of an RO system is just part of the ongoing cost. For a typical under-sink residential RO system, the upfront cost can range from $150 to $500, depending on the brand, number of stages, and features. However, you also need to factor in the cost of replacement filters and the membrane.
These replacement parts are essential for maintaining water quality and system performance.
- Pre-filter sets (sediment and carbon): These typically cost $20-$50 and should be replaced every 6-12 months.
- RO Membrane: These are more expensive, often ranging from $40-$100, and need replacement every 2-5 years.
- Storage Tank: While not a consumable, tanks can eventually fail and may need replacement, usually costing $50-$150.
Some systems also have higher water waste ratios, meaning more water is used to produce a gallon of purified water. This can lead to a slight increase in your water bill. For instance, a system with a 4:1 waste ratio means for every gallon of drinking water, 4 gallons go down the drain. Newer, more efficient systems might operate at a 1:1 ratio or even better.
RO Systems vs. Other Water Filtration Methods
When considering how to improve your home's water quality, RO isn't the only option. Understanding the differences can help you choose the best filtration method for your needs. Here's a quick look at common alternatives and how they stack up against RO.
| Feature / Method | Pitcher Filters | Faucet Filters | Under-Sink (Non-RO) Filters | Reverse Osmosis (RO) Systems |
|---|---|---|---|---|
| Filtration Level | Improves taste, reduces some contaminants | Improves taste, reduces chlorine, some metals | Multi-stage, better contaminant reduction | High-purity, removes majority of dissolved solids |
| Contaminants Removed | Chlorine, lead, mercury (varies by filter) | Chlorine, lead, sediment | Chlorine, lead, sediment, VOCs | Lead, chlorine, fluoride, arsenic, TDS, salts, minerals, etc. |
| Installation | None; fill and store | Attaches to faucet; simple twist-on | Under-sink plumbing connections required | Under-sink plumbing connections required |
| Water Output | Slow; filtered in batches | Instantaneous, but usually lower flow | Instantaneous; comparable to tap water flow | Slower production; stored in a tank |
| Cost (Initial) | $20 – $50 | $30 – $70 | $70 – $200 | $150 – $500+ |
| Ongoing Cost | Filter replacements every 2-3 months | Filter replacements every 2-4 months | Filter replacements every 6-12 months | Filter & membrane replacements (more expensive but less frequent) |
| Best For | Small needs, renters, budget-conscious | Quick filtered water at the sink | Better filtration without complex plumbing | High-purity drinking water needs, sensitive individuals |
While other methods offer convenience and cost savings, RO systems provide a level of purification that’s hard to match. If your priority is the cleanest possible drinking and cooking water, RO is often the top choice, provided you can manage the installation and maintenance.
Expert Tips for a Smooth Installation
Beyond the basic steps, a few pro tips can make your RO system installation go even smoother and help prevent future headaches. These come from analyzing common user experiences and manufacturer best practices.
- Read the Manual (Twice!): Seriously, even if you think you know what you're doing, your specific system's manual has details unique to its design. Pay special attention to diagrams showing tubing routing and filter order.
- Tag Your Tubes: If your tubing isn't color-coded, use a marker or small tags to label the ends going to the tank, faucet, and drain. This prevents mix-ups, especially if you have multiple water lines.
- Test Connections by Hand: Before turning the water back on, ensure all quick-connect fittings are fully seated. Gently tug on the tubing to confirm it’s locked in place. For threaded connections, give them a firm hand-tightening, then maybe an additional quarter-turn with a wrench if recommended by the manual.
- Plan for Filter Changes: Think about how you'll access the filters after installation. Ensure there's enough clearance to unscrew the housings without hitting other pipes or the cabinet wall. Some installers position the filter housings closer to the front of the cabinet for easier access.
- Inspect the Drain Saddle: Ensure the drain saddle you've installed is positioned correctly to allow water to drain freely. It should not be submerged in standing water in the drainpipe, which can cause backflow and odors.
Safety First: Warnings and Precautions
While RO system installation is a DIY project for many, there are crucial safety aspects to keep in mind. Working with water and plumbing always carries some risk, and understanding these can prevent potential damage or injury.
- Water Shut-Off: Always turn off the main water supply to the area before attempting any connections. For under-sink installations, the dedicated shut-off valve for the faucet is usually sufficient. If you're unsure, shutting off the main water to your house is the safest bet.
- Electrical Components: If your RO system includes an electric pump, UV sterilizer, or electronic TDS meter, ensure all electrical connections are made with the power off. Follow the specific wiring diagrams provided by the manufacturer meticulously. Water and electricity are a dangerous combination.
- Drain Connections: Improperly connecting the drain line can lead to leaks, water damage, and potential mold growth. Ensure the drain saddle is sealed correctly and that the connection allows for free flow of wastewater.
- Sanitization: Some manufacturers recommend sanitizing the system with a sanitizing solution after installation or filter changes, especially if the system has been open to the air for an extended period. Follow these instructions precisely.
- Manufacturer's Liability: Improper installation might void your warranty. Always adhere to the specific instructions provided by the RO system manufacturer. If you’re uncomfortable with any step, hiring a qualified plumber is the best course of action to ensure the system is installed correctly and safely.